Create a Theme from scratch#
We're going to create a theme for Plone 6 Classic UI that is built from scratch. There are no dependencies except Bootstrap itself. This approach will allow you to change and extend the look and feel of Plone to your needs. You will develop on the file system. You can add your package to any code repository, such as GitHub, and reuse it on different Plone sites.
Use Case
Minimalistic theming approach for Plone Classic UI
There is no separation between frontend and logged in aka backend
Suitable when you use Plone for modern websites or applications with custom UI
You'll create our own theme package
You'll create a theme for Plone 6 Classic UI
You'll use Bootstrap as basis
You'll compile your own CSS including Bootstrap
What you will learn
How to prepare your development setup
How to create your theme package using plonecli
How to add a theme to your package using plonecli
What are the important parts of your theme
How to add and compile your styles
Requirements#
Check out the requirements for the theming training. You have to bring a Linux-based laptop (Ubuntu, macOS) with a code editor of your choice (we recommend VS Code) and with Plone installed as described in the training instructions. It is extremely important that you join the class with a working Plone installation. You need the npm package manager to build your CSS/JavaScript.
Create an add-on package#
We're going to create an add-on package for our theme. We'll use plonecli for the next steps. It uses mr.bob and its templates. There is a template to create our add-on. There are templates to add the theme to the package in the following steps.
The package contains the theme and is developed on the filesystem. Development and compilation are done locally.
Create an add-on package for your theme using plonecli in the current folder:
$ plonecli create addon plonetheme.tokyo
Note
Check the output on your console. Lines starting with RUN shows you the actual command that is fired in the background.
RUN: mrbob bobtemplates.plone:addon -O ./plonetheme.tokyo
You're going to be asked some questions. It's good to go with defaults for now. Since there is work in progress, Plone version 5.2.2 will result in Plone 6.0. Don't bother with that.
--> Author's name [Your Name]:

--> Author's email [yourname@example.com]:

--> Author's GitHub username: your_github_name_

--> Package description [An add-on for Plone]:

--> Do you want me to initialize a GIT repository in your new package?

--> Plone version [6.0]:

--> Python version for virtualenv [python3]:

--> Do you want me to activate VS Code support? (y/n) [y]:
Note
plonecli asks you to create or update a local git repository after some steps. Yes is a good option.
Create theme#
In the next steps, we're going to add a theme to our package. We'll use plonecli for that again. We use the template theme_basic here.
Step into the package directory:
$ cd plonetheme.tokyo
Add theme using theme_basic template. Run the command inside your package:
$ plonecli add theme_basic
There are different theme templates available. As shown in the previous chapter, theme_barceloneta is built on top of the Barceloneta theme. Our theme_basic is a more generic approach:
No dependencies to Barceloneta
Since there is no rules.xml Diazo is disabled
All templates are served without modification
Markup in Plone Classic UI is mostly Boostrap
You have to take care of some aspects e.g. columns
Build Instance#
Get your instance up and running. The build command of plonecli will run a couple of commands for you. Green bars show you what actual command has been fired.
It creates a python3 virtualenv
It installs all dependencies using pip
It will bootstrap the buildout of the Zope applicaton server
It will run the actual buildout
Start the build process by running plonecli build in your terminal
$ plonecli build
Output#
The output on our console should contain the following steps:
RUN: python3 -m venv venv

RUN: ./venv/bin/pip install -r requirements.txt --upgrade

RUN: ./venv/bin/buildout bootstrap

RUN: ./venv/bin/buildout
If everything works as expected next step is to start up your instance for the first time.
Startup#
We recommend to swith to your SDK here. If you're using Visual Studio Code you can open a terminal Terminal > New Terminal and run the following commands inside your editor. This helps you to keep track of windows and processes.
Start your instance for the very first time:
./bin/instance fg
Note
The command starts an instance of the Zope application server in foreground. This turns on the debug mode automatically. If everything starts as expected you should see something like that on your console:
2078-12-24 19:37:49,830 INFO [waitress:485][MainThread] Serving on http://localhost:8080/
Login#
Open your browser and navigate to Zope's management interface:
This will ask you for login credentials:
Username: admin
Password: admin
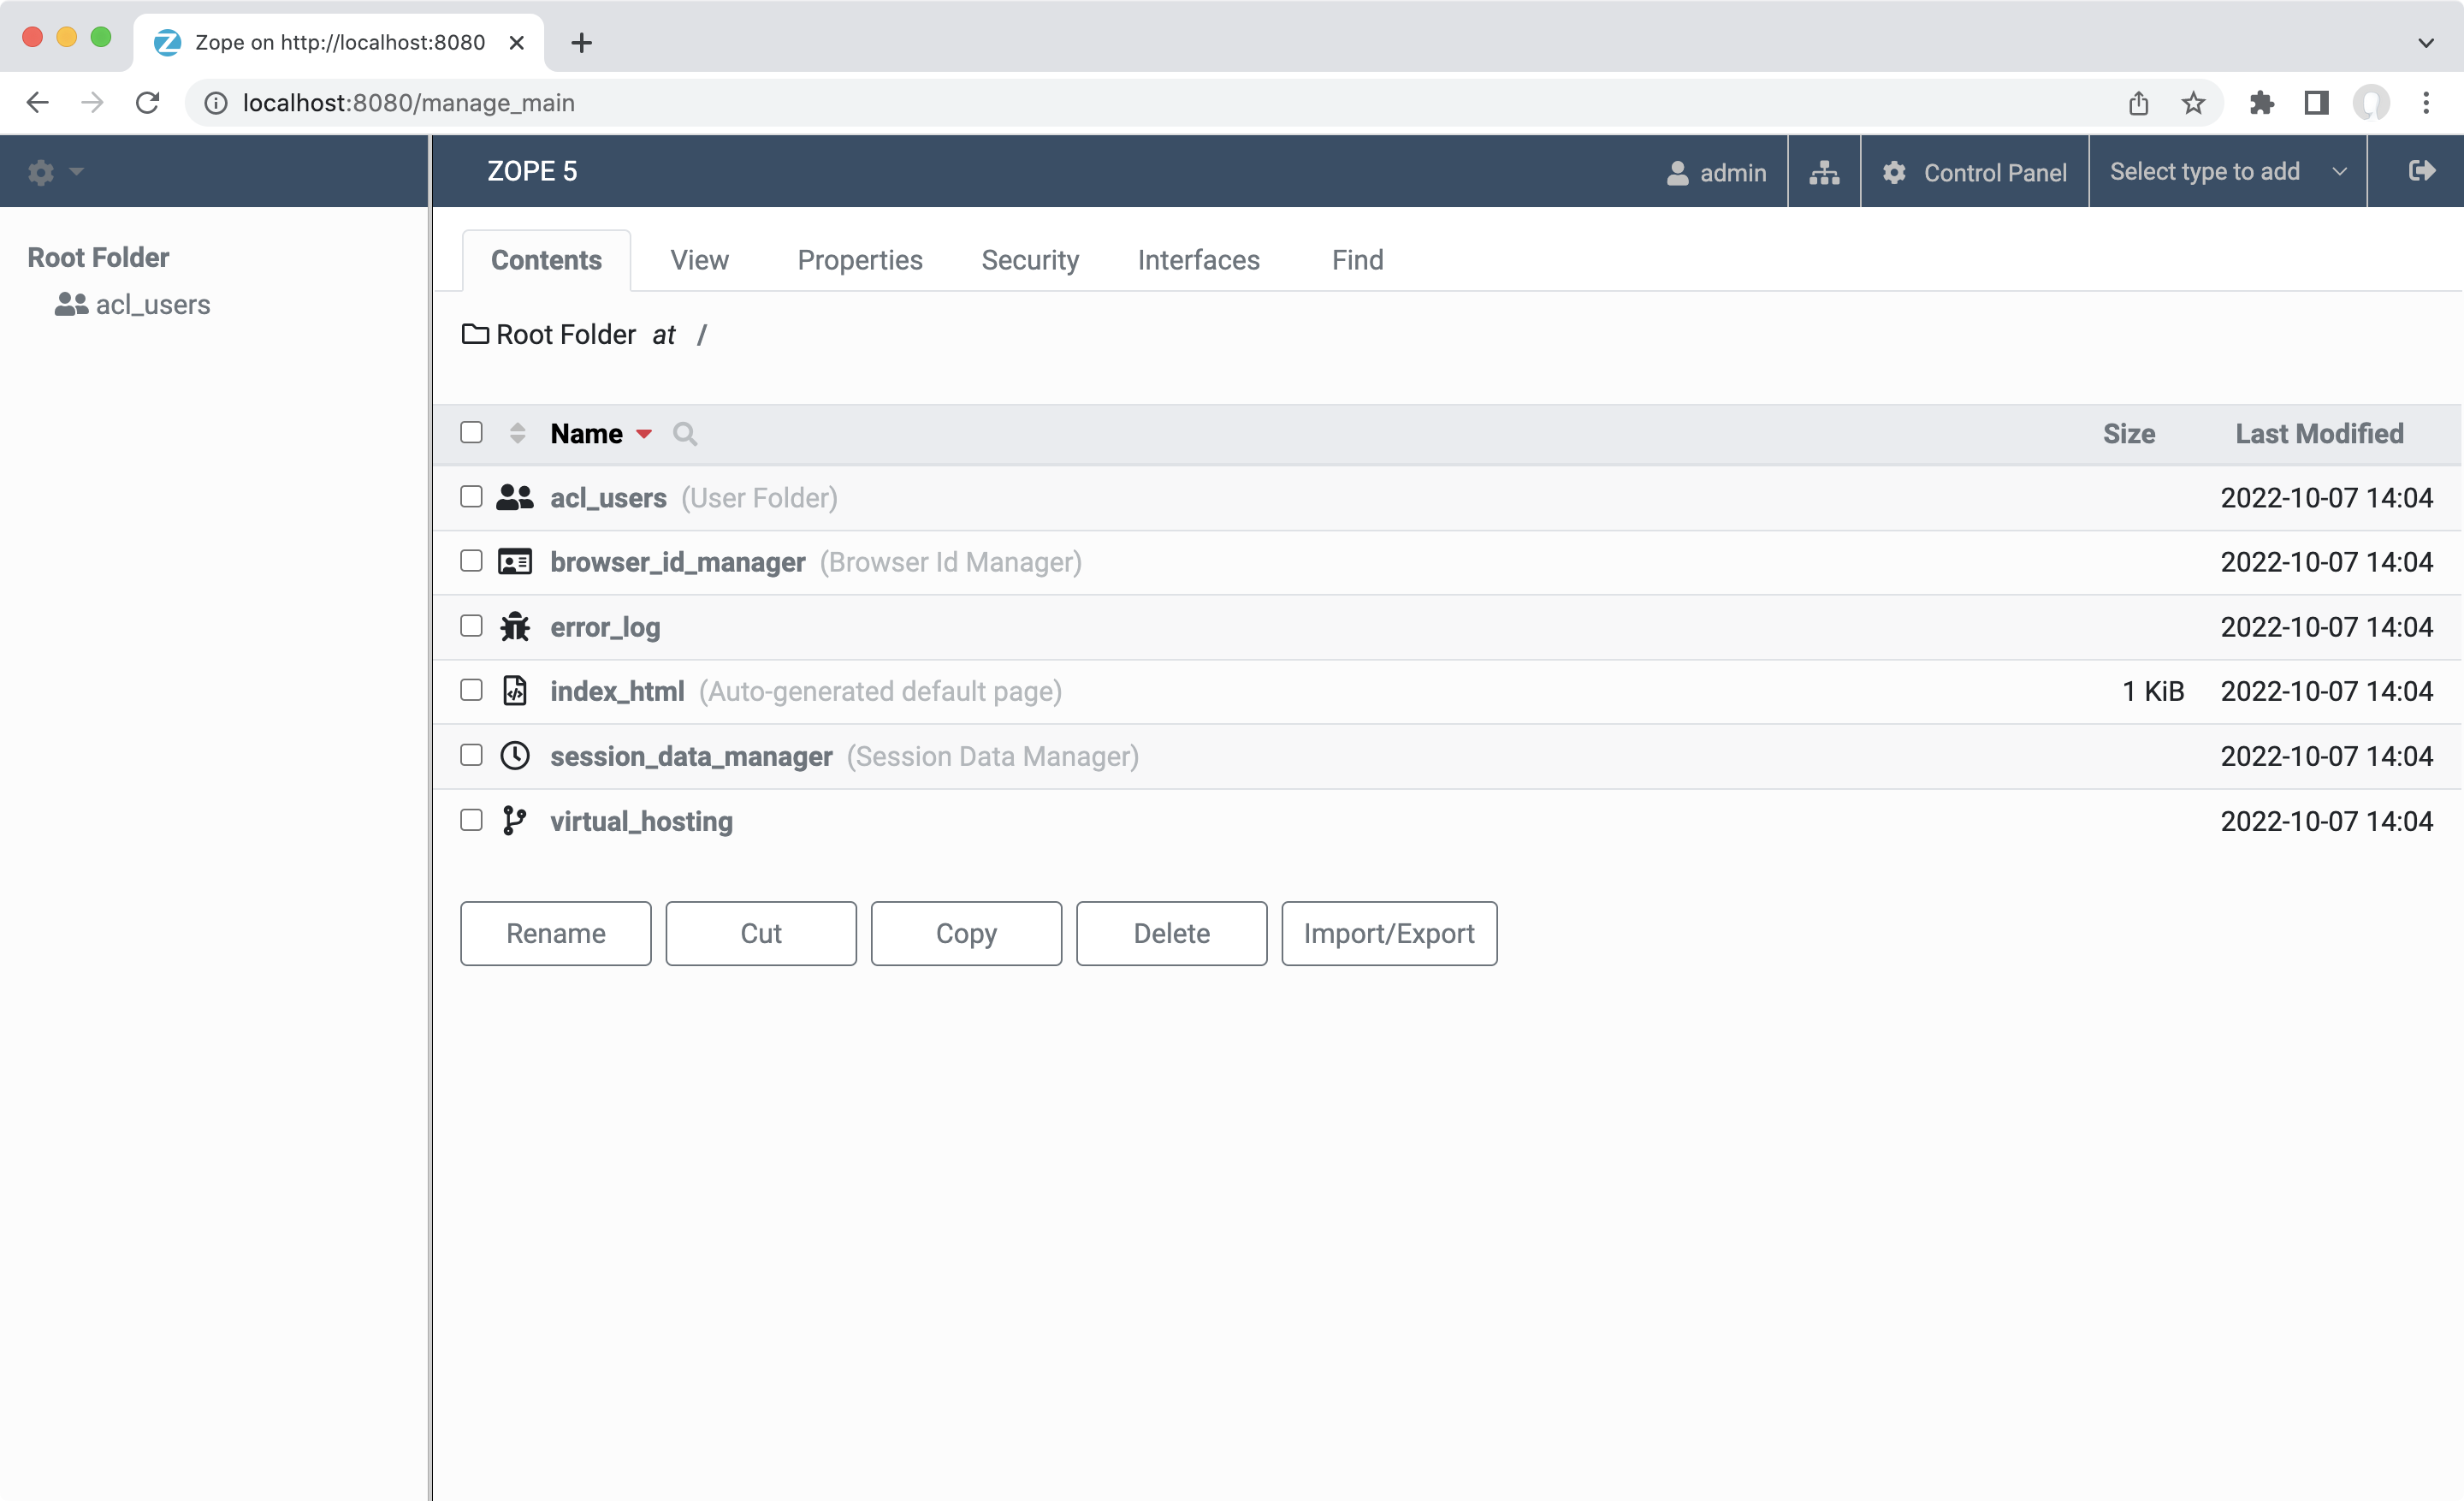
Zope Management Interface
Add your first Plone Site#
Since your're logged in now you can add a Plone instance:
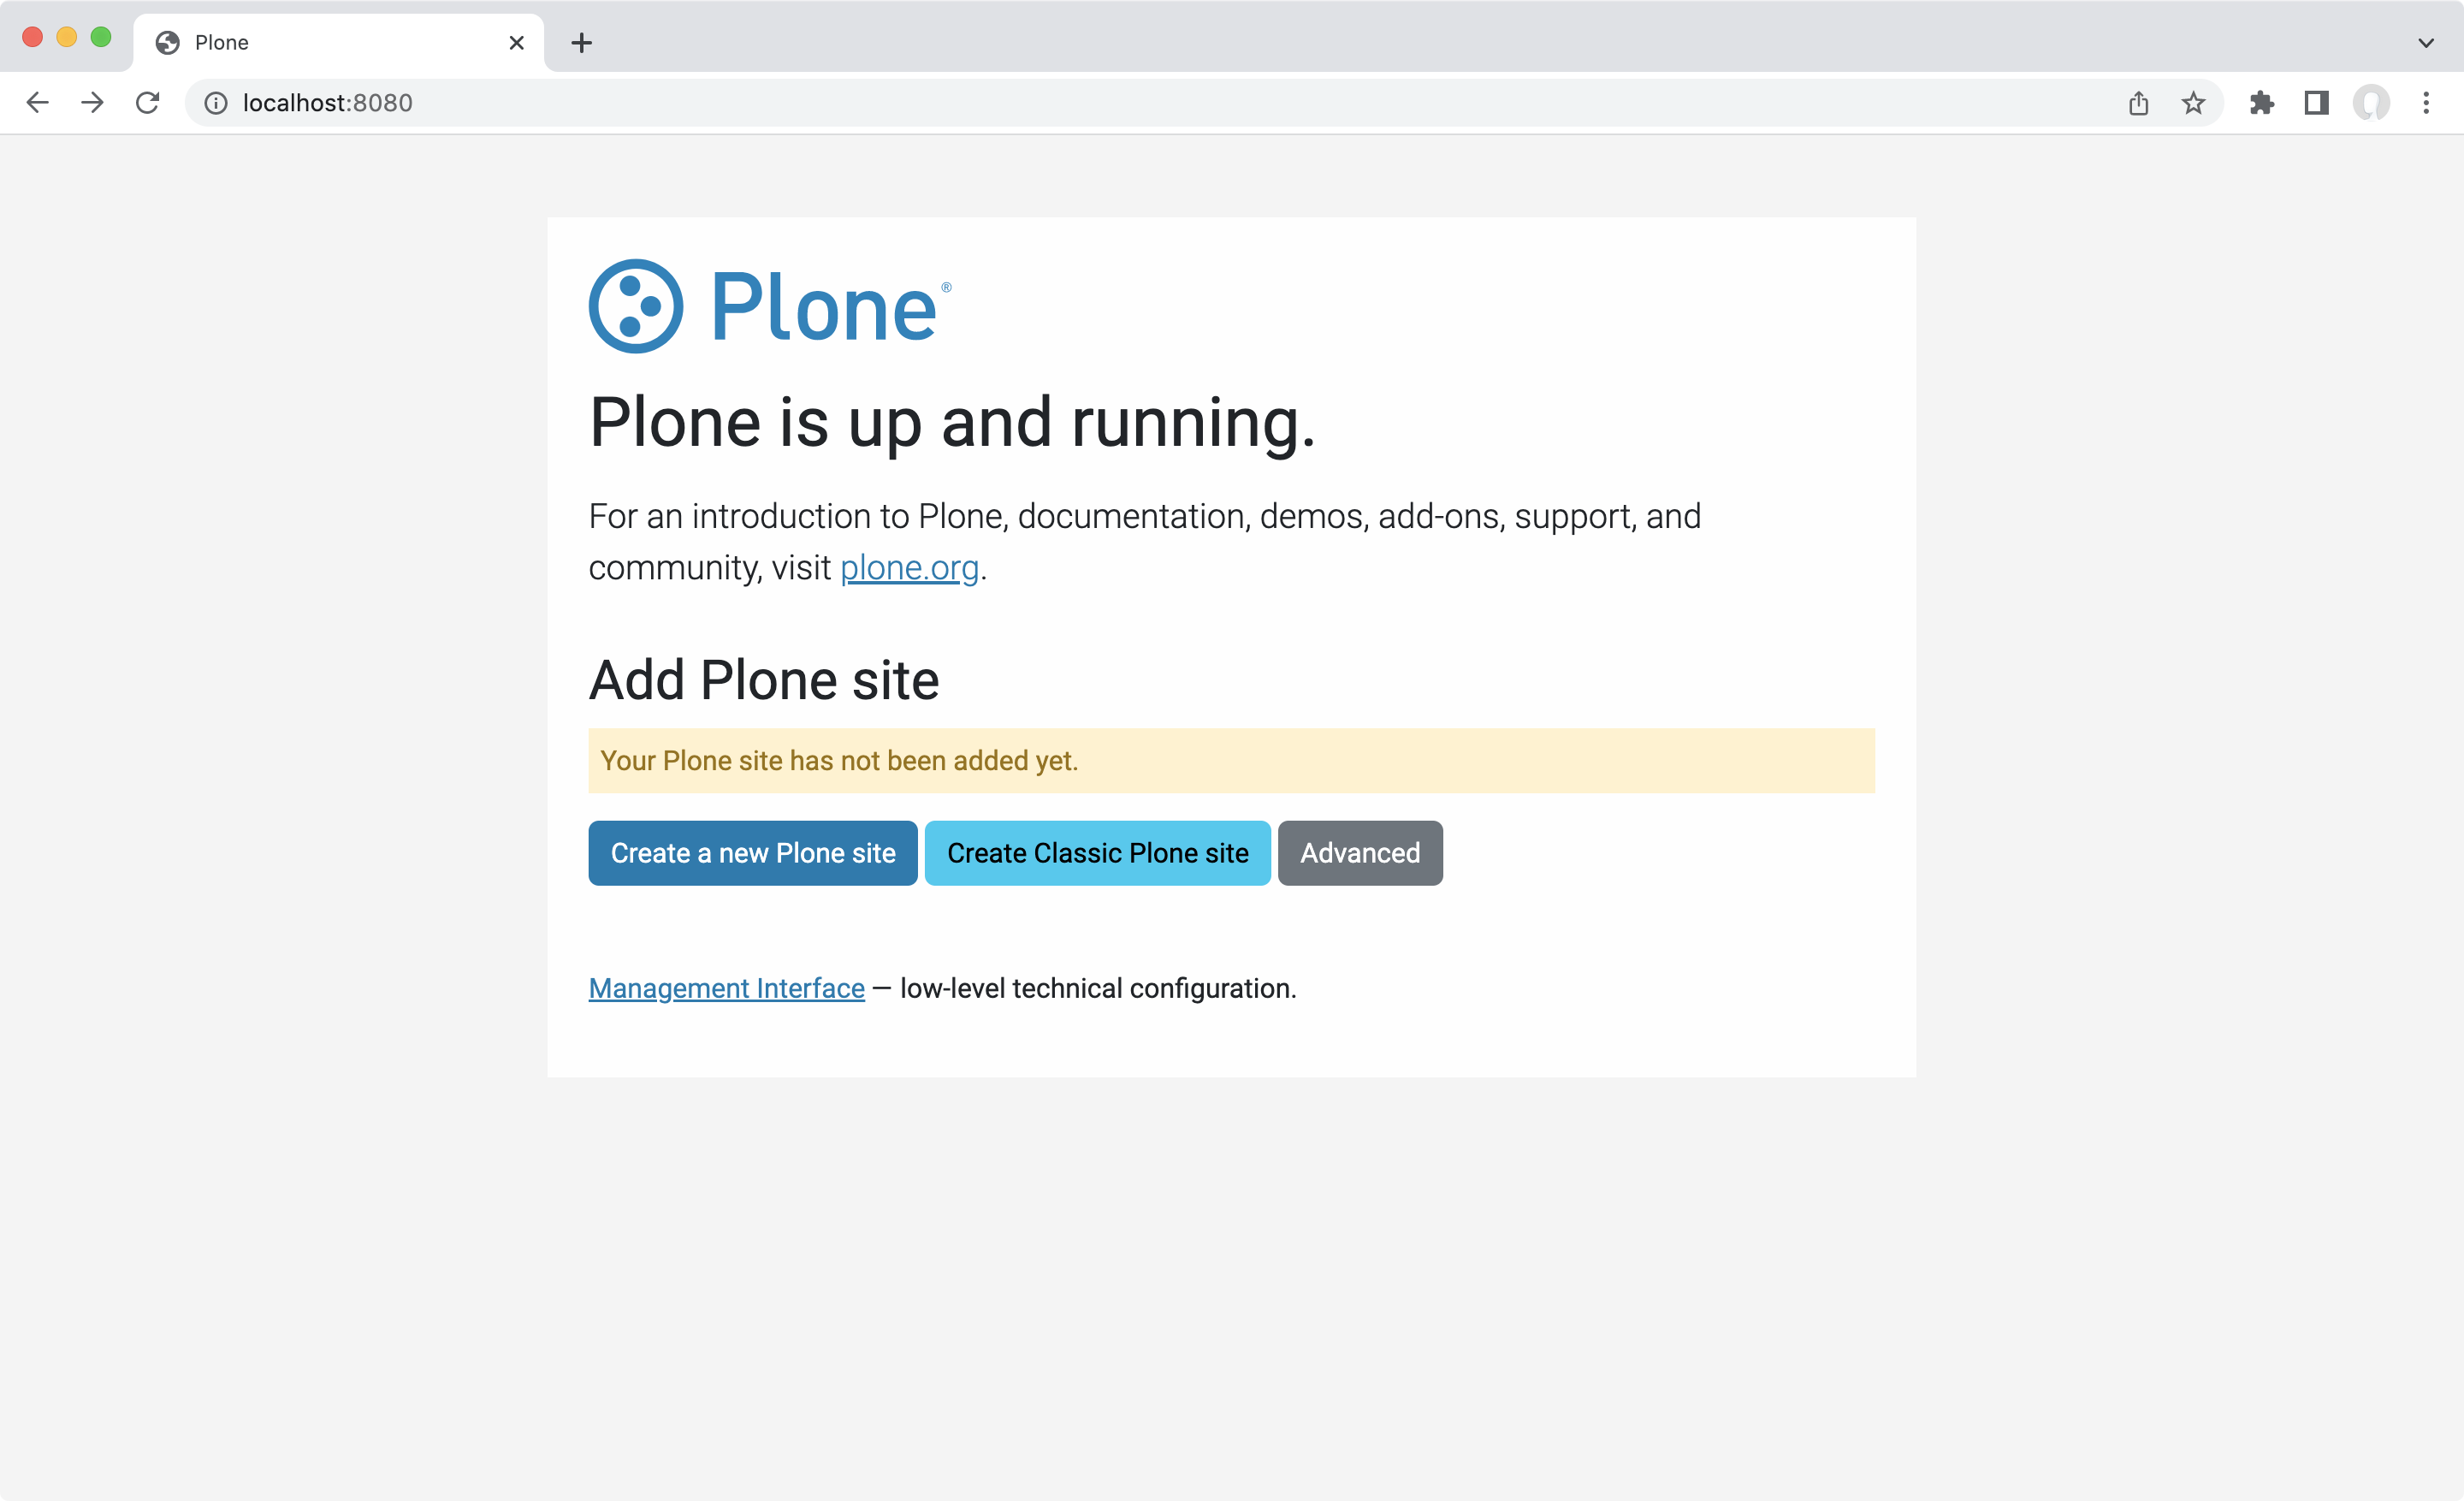
Click on Create Classic Plone site to add your site.
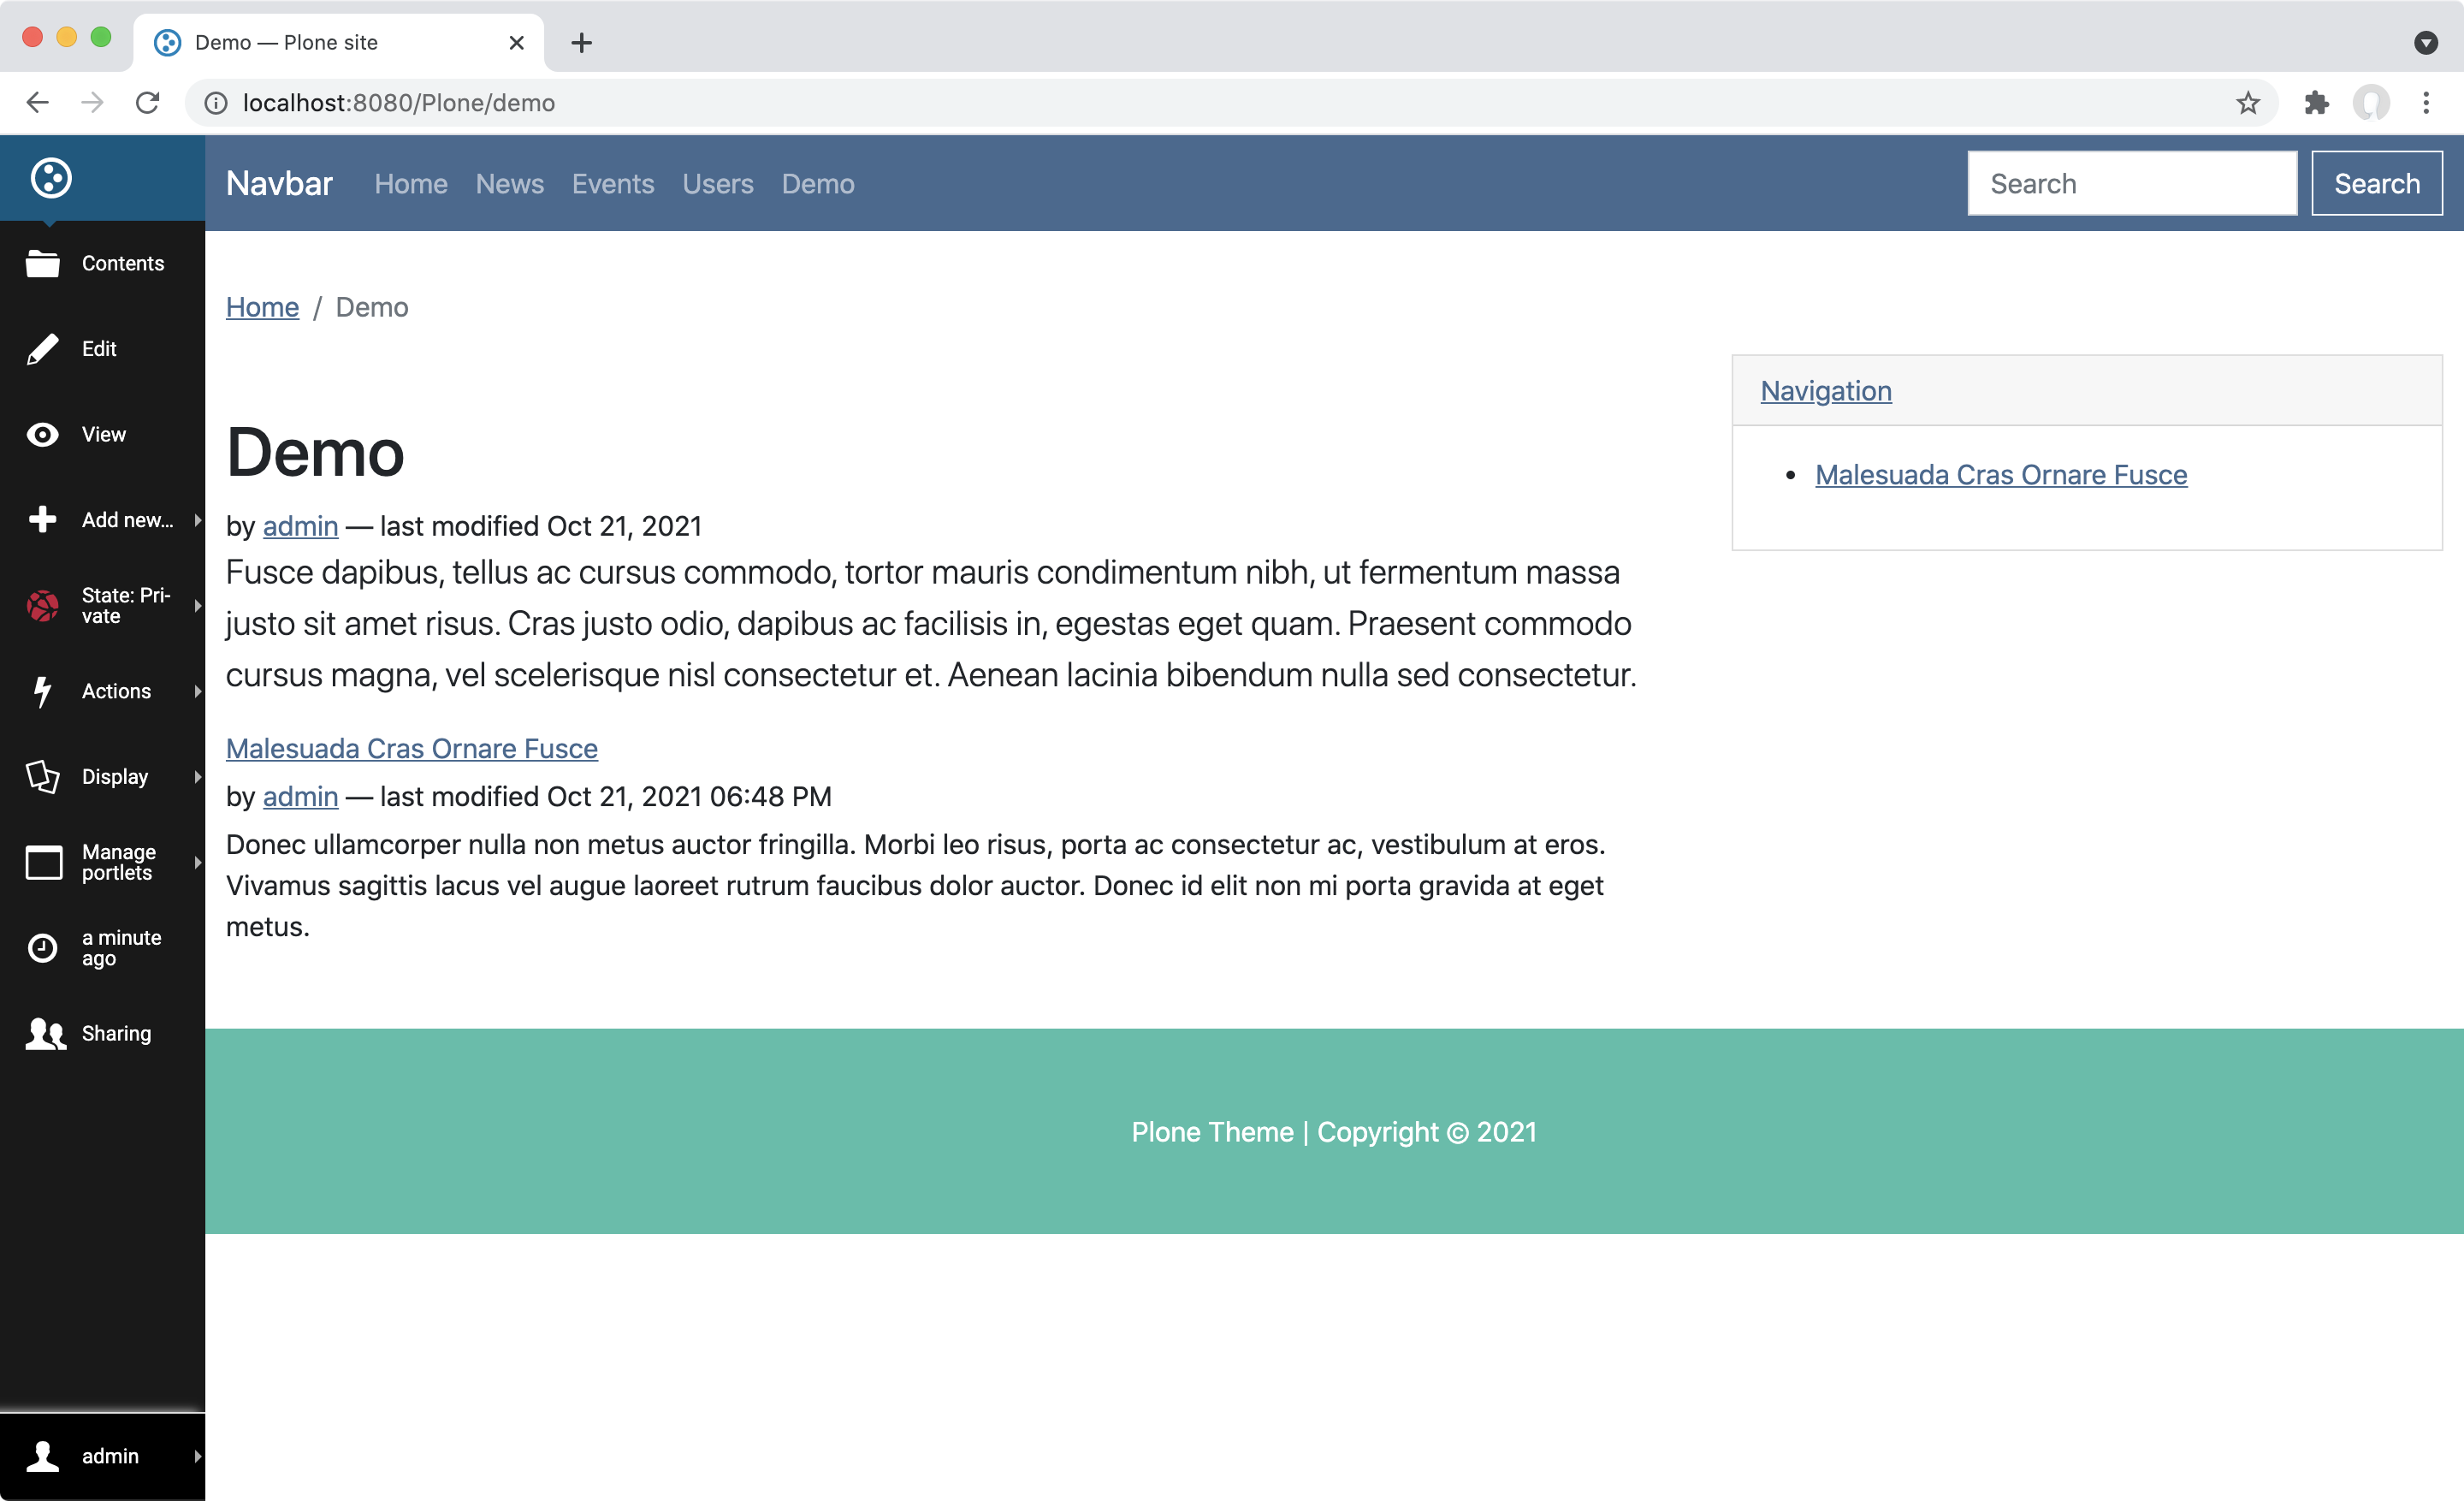
You see some basic styling because a precompiled src/plonetheme/tokyo/theme/css/theme.min.css has been shipped with the template.
Now we have to activate our add-on. This is done in the add-on section of the control panel:
http://localhost:8080/Plone/@@overview-controlpanel

Navigate to the control panel and activate your add-on. After that step your site may look broken until we actually work on the new theme. Before we start theming we're going to add a copy of the main template to our theme package.
Note
You can always switch back to the default Barceloneta theme in the theming control panel: http://localhost:8080/Plone/@@theming-controlpanel
Override Main Template#
Copy the page template from parts/omelette/Products/CMFPlone/browser/templates/main_template.pt to src/plonetheme/tokyo/browser/templates/main_template.pt.
Copy the main template python file from parts/omelette/Products/CMFPlone/browser/main_template.py to src/plonetheme/tokyo/browser/main_template.py.
Note
It's recommended to make a commit before you make changes to the template to have a clean diff. Create a folder for templates if it does not already exist.
Register the template:
  <browser:page
      for="*"
      name="main_template"
      class=".main_template.MainTemplate"
      permission="zope.Public"
      layer="plonetheme.tokyo.interfaces.IPlonethemeTokyoLayer"
      />
In the next step we'll make use of Bootstrap's grid system and add some columns to our main template.
Conflicts#
If you try to register templates that already exists in Plone under the same name you'll get a ConfigurationConflictError.
zope.configuration.config.ConfigurationConflictError: Conflicting configuration actions
  For: ('view', (None, <InterfaceClass zope.publisher.interfaces.browser.IDefaultBrowserLayer>), 'main_template', <InterfaceClass zope.publisher.interfaces.browser.IBrowserRequest>)
    File "/Users/jdoe/.buildout/eggs/Products.CMFPlone-6.0.0a1.dev1-py3.7.egg/Products/CMFPlone/browser/configure.zcml", line 91.2-96.8
        <browser:page
            for="*"
            name="main_template"
            class=".main_template.MainTemplate"
            permission="zope.Public"
            />
    File "/Users/jdoe/Development/plonetheme.tokyo/src/plonetheme/tokyo/browser/configure.zcml", line 21.2-26.8
        <browser:page
            for="*"
            name="main_template"
            class=".main_template.MainTemplate"
            permission="zope.Public"
            />
You can avoid this by adding a theme layer to your configuration as seen in the above example:
layer="plonetheme.tokyo.interfaces.IPlonethemeTokyoLayer"
Add Columns#
Let's make use of Bootstrap's layout system and add a container, a row and some columns. Check out the Bootstrap documentation if your're not familiar with that.
<metal:page define-macro="master">
<tal:doctype tal:replace="structure string:<!DOCTYPE html>" />
<html xmlns="http://www.w3.org/1999/xhtml"
xmlns:tal="http://xml.zope.org/namespaces/tal"
xmlns:metal="http://xml.zope.org/namespaces/metal"
xmlns:i18n="http://xml.zope.org/namespaces/i18n"
tal:define="portal_state python:context.restrictedTraverse('@@plone_portal_state');
context_state python:context.restrictedTraverse('@@plone_context_state');
plone_view python:context.restrictedTraverse('@@plone');
icons python:context.restrictedTraverse('@@iconresolver');
plone_layout python:context.restrictedTraverse('@@plone_layout');
lang python:portal_state.language();
view nocall:view | nocall: plone_view;
dummy python: plone_layout.mark_view(view);
portal_url python:portal_state.portal_url();
checkPermission python:context.restrictedTraverse('portal_membership').checkPermission;
site_properties python:context.restrictedTraverse('portal_properties').site_properties;
ajax_include_head python:request.get('ajax_include_head', False);
ajax_load python:False;"
i18n:domain="plone"
tal:attributes="lang lang;">
<metal:cache tal:replace="structure provider:plone.httpheaders" />
<head>
<meta charset="utf-8" />
<div tal:replace="structure provider:plone.htmlhead" />
<tal:comment replace="nothing">
Various slots where you can insert elements in the header from a template.
</tal:comment>
<metal:topslot define-slot="top_slot" />
<metal:headslot define-slot="head_slot" />
<metal:styleslot define-slot="style_slot" />
<div tal:replace="structure provider:plone.scripts" />
<metal:javascriptslot define-slot="javascript_head_slot" />
<link tal:replace="structure provider:plone.htmlhead.links" />
<meta name="generator" content="Plone - https://plone.org/" />
</head>
<body tal:define="isRTL portal_state/is_rtl;
sl python:plone_layout.have_portlets('plone.leftcolumn', view);
sr python:plone_layout.have_portlets('plone.rightcolumn', view);
body_class python:plone_layout.bodyClass(template, view);"
tal:attributes="class body_class;
dir python:isRTL and 'rtl' or 'ltr';
python:context.restrictedTraverse('@@plone_patterns_settings')();"
id="visual-portal-wrapper">
<div tal:replace="structure provider:plone.toolbar" />
<header id="portal-top" i18n:domain="plone">
<div tal:replace="structure provider:plone.portaltop" />
<div id="portal-header">
<div tal:replace="structure provider:plone.portalheader" />
</div>
</header>
<div id="portal-mainnavigation" tal:content="structure provider:plone.mainnavigation">
The main navigation
</div>
<section id="global_statusmessage">
<tal:message tal:content="structure provider:plone.globalstatusmessage"/>
<div metal:define-slot="global_statusmessage">
</div>
</section>
<div class="container">
<div class="row">
<div class="col-lg-8">
<div id="viewlet-above-content" tal:content="structure provider:plone.abovecontent" />
<article id="portal-column-content">
<metal:block define-slot="content">
<metal:content metal:define-macro="content">
<metal:slot define-slot="body">
<article id="content">
<metal:bodytext define-slot="main">
<header>
<div id="viewlet-above-content-title" tal:content="structure provider:plone.abovecontenttitle" />
<metal:title define-slot="content-title">
<h1 tal:replace="structure context/@@title" />
</metal:title>
<div id="viewlet-below-content-title" tal:content="structure provider:plone.belowcontenttitle" />
<metal:description define-slot="content-description">
<p tal:replace="structure context/@@description" />
</metal:description>
<div id="viewlet-below-content-description" tal:content="structure provider:plone.belowcontentdescription" />
</header>
<div id="viewlet-above-content-body" tal:content="structure provider:plone.abovecontentbody" />
<div id="content-core">
<metal:text define-slot="content-core" tal:content="nothing">
Page body text
</metal:text>
</div>
<div id="viewlet-below-content-body" tal:content="structure provider:plone.belowcontentbody" />
</metal:bodytext>
<footer>
<div id="viewlet-below-content" tal:content="structure provider:plone.belowcontent" />
</footer>
</article>
</metal:slot>
</metal:content>
</metal:block>
</article>
</div>
<div class="col-lg-4">
<aside id="portal-column-one"
metal:define-slot="column_one_slot"
tal:condition="sl">
<metal:portlets define-slot="portlets_one_slot">
<tal:block replace="structure provider:plone.leftcolumn" />
</metal:portlets>
</aside>
<aside id="portal-column-two"
metal:define-slot="column_two_slot"
tal:condition="sr">
<metal:portlets define-slot="portlets_two_slot">
<tal:block replace="structure provider:plone.rightcolumn" />
</metal:portlets>
</aside>
</div>
</div>
</div>
<footer id="portal-footer-wrapper" i18n:domain="plone">
<div tal:replace="structure provider:plone.portalfooter" />
</footer>
</body>
</html>
</metal:page>
This is an example of the main_template.pt at the point of time when the documentation has been written. We recommend to copy over the main template from your actual code or grab it from GitHub to get the newest version.
Note
It's possible to archive this with mixins as well. Check out Barceloneta's grid.scss for this.
Build Process#
No we have everything in place to start theming. Let's start with compiling our actual CSS from the given SASS files.
Install Dependencies#
Step into the theme folder of your package:
$ cd ./src/plonetheme/tokyo/theme
Run npm install to add dependencies from package.json:
$ npm install
Compile Resources#
Run npm run build to add dependencies from package.json:
$ npm run build
This will compile your scss/theme.scss into css/theme.css. A minified version will be created as well. Check out the scripts section from package.json so see what happens exactly.
Watch for Changes#
Run npm run watch to automatically compile when a file has been changed:
$ npm run watch
With npm run watch you start the build process automatically when you save a file.
Happy Theming#
We can start theming finally. Let's change some colors now.
Variables#
Bootstrap's variables has been mentioned in the previous chapter. If you need to add a variable to our theme.scss have a look at the definition from Bootstrap. They're located in src/plonetheme/tokyo/theme/node_modules/bootstrap/scss/_variables.scss. We'll use some of them later.
Change Colors#
Go to your src/plonetheme/tokyo/theme/scss/theme.scss and change the primary and secondary colors:
$primary: #456990;
$secondary: #49BEAA;
watch will start the build process as soon as you save your file. Check out your console output. After the build has been finished, go to your browser and reload the window.
The navbar uses the primary color. Secondary is used for the footer in this example.
Note
Open the developer tools of your browser and navigate to the network tab. Disabling the cache is your fiend.
Add Logo#
We'll add the logo to Bootstrap's navbar. Go to src/plonetheme/tokyo/browser/overrides/plone.app.layout.viewlets.sections.pt and change the navbar brand from:
<a class="navbar-brand" href="#">Navbar</a>
to:
<a class="navbar-brand" href="${context/portal_url}">
  <img src="${context/portal_url}/++plone++plonetheme.tokyo/plone-logo-white.svg" alt="Plone" height="36" class="pb-1" />
</a>
You have to save a SVG logo named plone-logo-white.svg to src/plonetheme/munich/browser/static/plone-logo-white.svg. Feel free to grab it from Tokyo Theme demo page.
Now we have a Plone logo used as navbar brand
Contenttype Templates#
Every content type in Plone comes with its own template. The easiest way to modify the template of a content type is an override.
Override existing Templates#
We copy the original template from the source code to our project. Copy the file located at parts/omelette/plone/app/contenttypes/browser/templates/document.pt to our overrides folder at src/plonetheme/tokyo/browser/overrides/plone.app.contenttypes.browser.templates.document.pt.
We'll use z3c.jbot to override templates
Overrides folder is registered in our
src/plonetheme/tokyo/browser/configure.zcmlCreate a empty file (as done for the header) or copy an existing one
Dotted name is the actual path to the original template.
You have to restart your instance when adding new files. Changes in existing templates in the overrides folder take effect without a restart.
We'll change the template now. Here is an example of a minimalistic Document template:
<html xmlns="http://www.w3.org/1999/xhtml" xml:lang="en"
    xmlns:tal="http://xml.zope.org/namespaces/tal"
    xmlns:metal="http://xml.zope.org/namespaces/metal"
    xmlns:i18n="http://xml.zope.org/namespaces/i18n"
    lang="en"
    metal:use-macro="context/@@main_template/macros/master"
    i18n:domain="plone">
<body>

<metal:content-core fill-slot="main">

<h1>${context/Title}</h1>

<p class="lead">${context/Description}</p>

<div tal:condition="context/text" tal:content="structure python:context.text.output_relative_to(view.context)">
  Text
</div>

</metal:content-core>

</body>
</html>
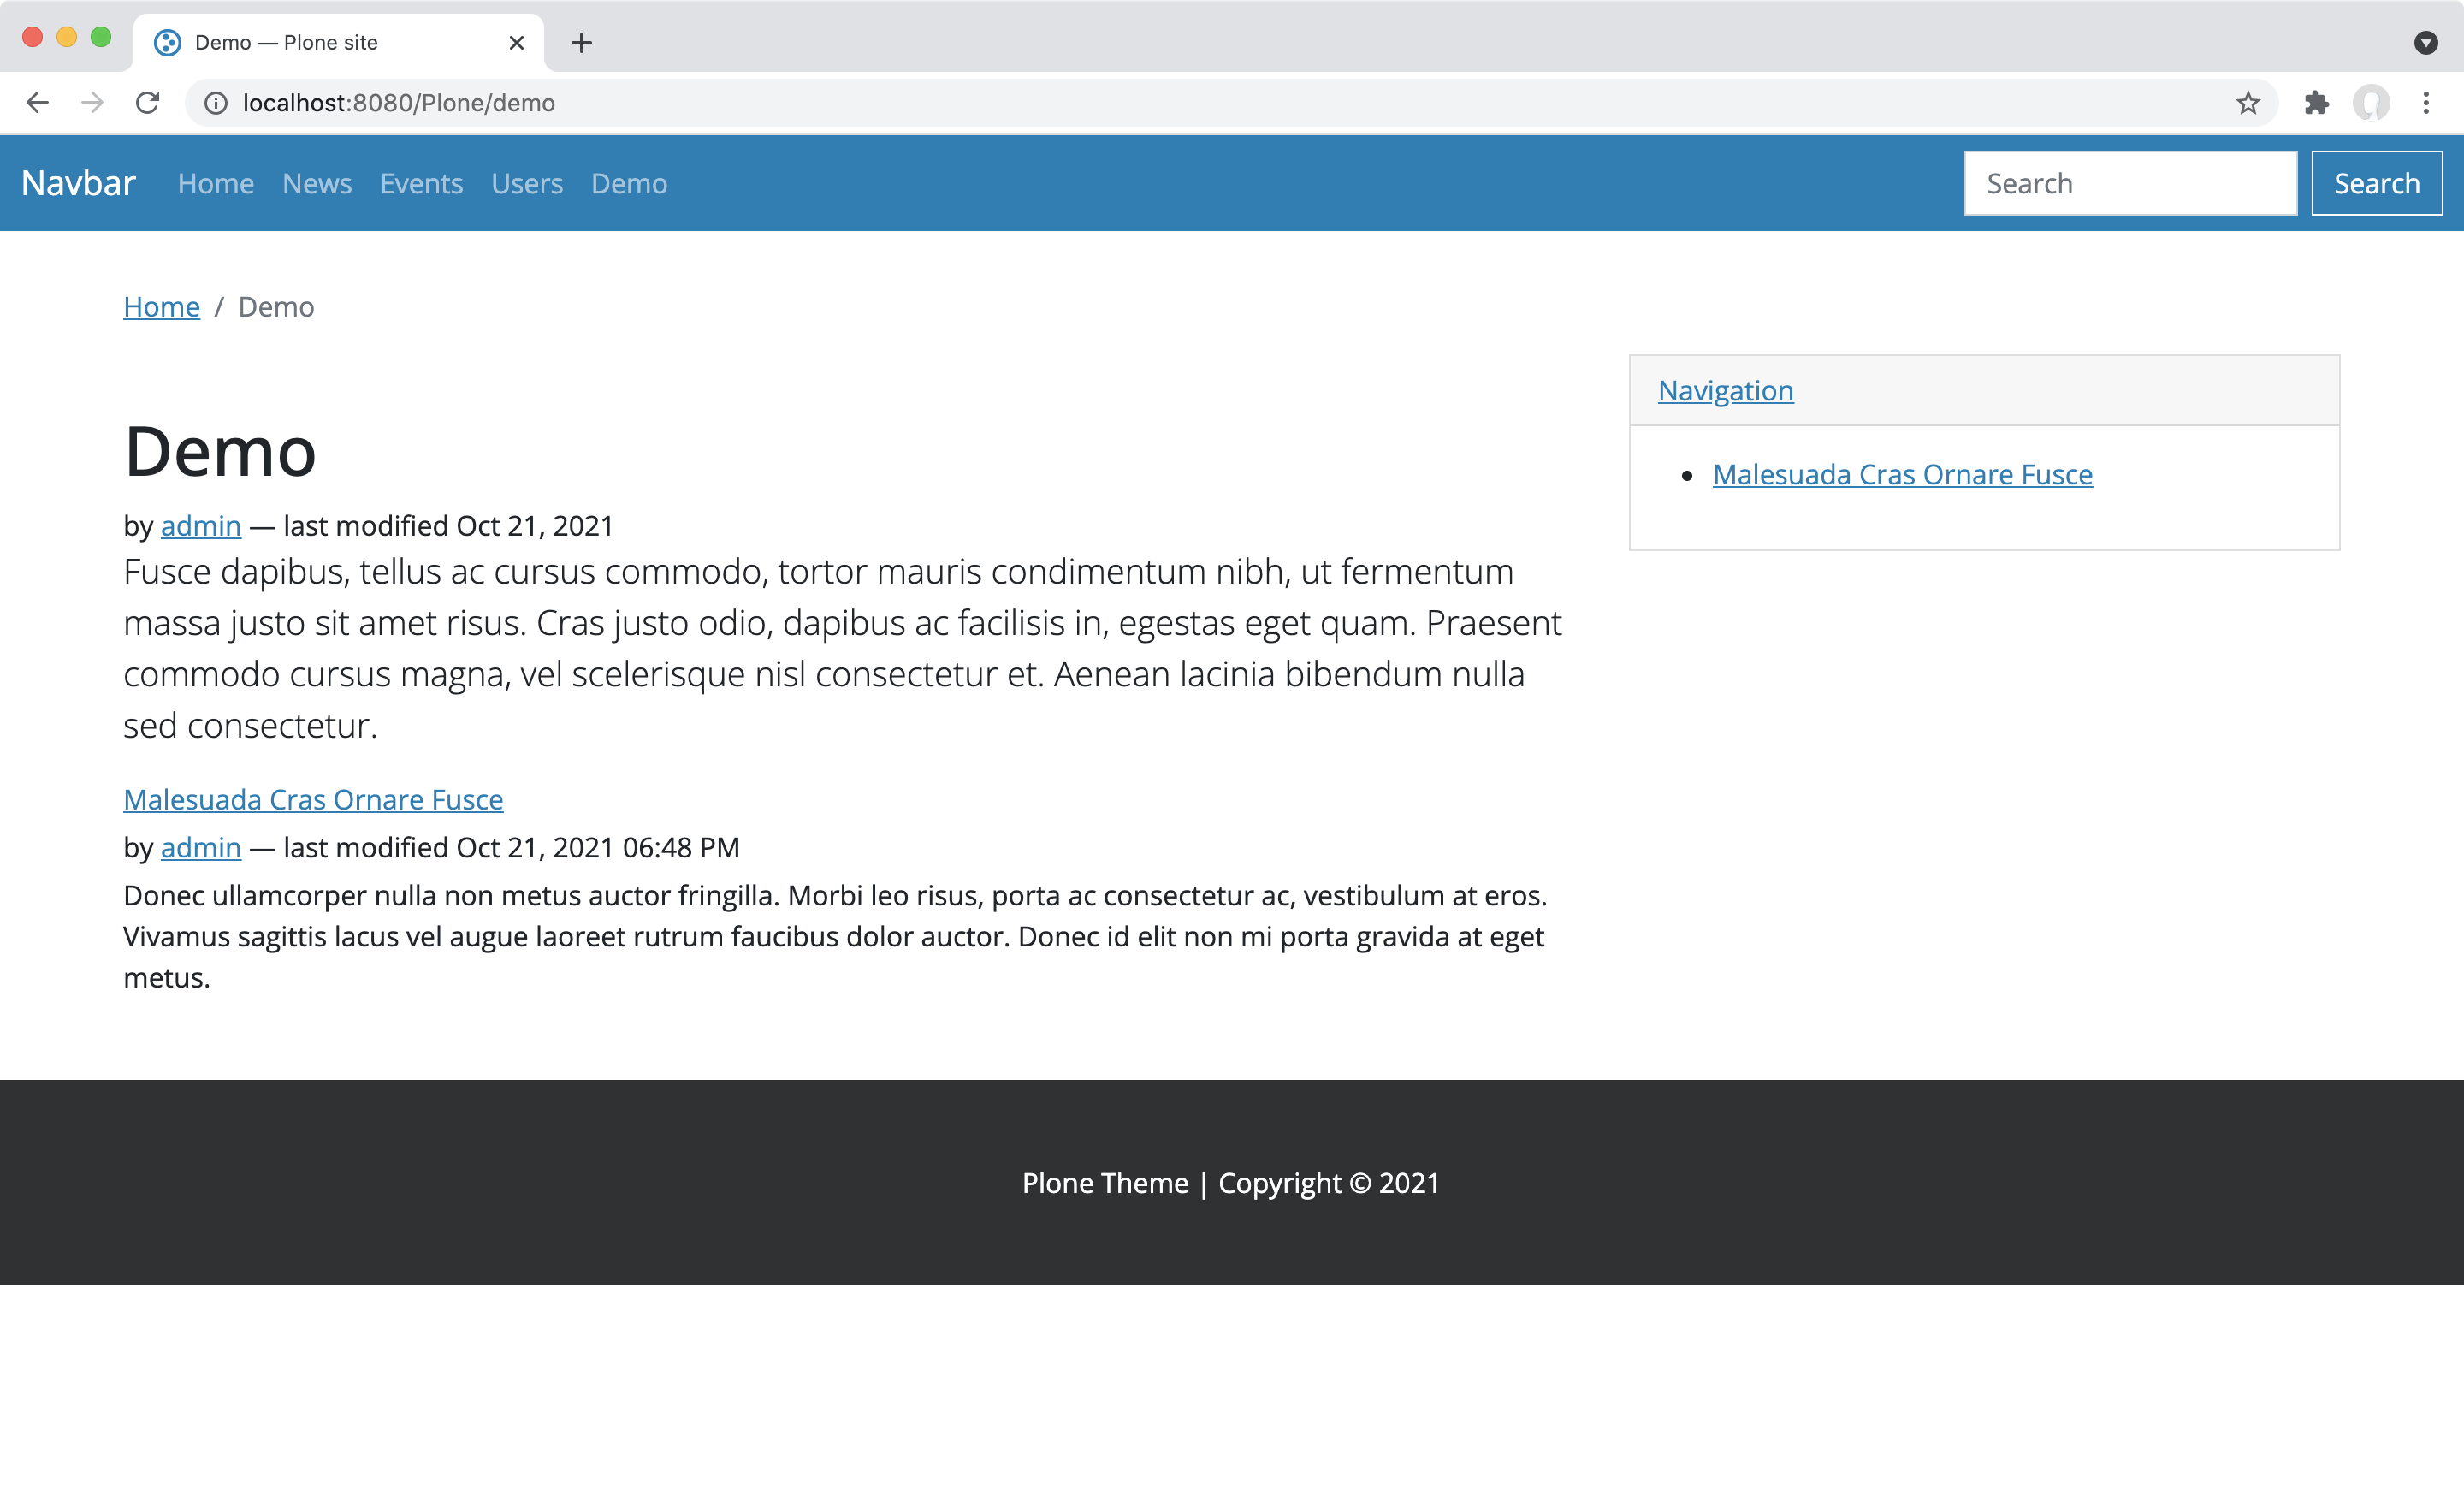
This will result in:
We use fill-slot="main" to fill a more generic slot. This allows us to touch everything from headline to stuff that is registered below content body. Check out the main_template.pt to learn more about slots.
Register new Template#
For folders, Plone ships different views you can choose from. For the content type Document, there is only one view available. If you want to select from different views for Documents as well, you'll have to register a new view. Have a look at the Create a theme based on Diazo training to learn more about views. There is an example of how to create a new view from scratch using plonecli.
Other than overrides, as shown before, a new view is registered via configure.zcml. Here is an example for a new view called minimalistic registered for the content type Document:
<browser:page
  name="minimalistic"
  for="plone.app.contenttypes.interfaces.IDocument"
  class=".minimalistic.MinimalisticView"
  template="minimalistic.pt"
  permission="zope2.View"
  />
Add custom Font#
We'll add a custom font using Google Fonts. Go to Google Fonts and select the styles you want to use.
We create a new file src/plonetheme/tokyo/theme/scss/_fonts.scss to keep the font stuff together. In a real word project you probably want to add the actual font files to your project an serve them directly. For now we use a import:
@import url('https://fonts.googleapis.com/css2?family=Open+Sans:ital,wght@0,300;0,400;0,700;1,300;1,400;1,700&display=swap');
We copy over the variable from Bootstrap's variables to our theme.scss and add Open Sans in front of all other fonts:
// Fonts
$font-family-sans-serif: "Open Sans", system-ui, -apple-system, "Segoe UI", Roboto, "Helvetica Neue", Arial, "Noto Sans", "Liberation Sans", sans-serif, "Apple Color Emoji", "Segoe UI Emoji", "Segoe UI Symbol", "Noto Color Emoji" !default;
Last step is to import our newly created _fonts.scss as last line in theme.scss:
@import "fonts";
Here is the complete theme.scss:
// Bootstrap Variable Overrides

$enable-rounded: false;
$primary: #007eb6;
$secondary: #2e3133;

// Fonts
$font-family-sans-serif: "Open Sans", system-ui, -apple-system, "Segoe UI", Roboto, "Helvetica Neue", Arial, "Noto Sans", "Liberation Sans", sans-serif, "Apple Color Emoji", "Segoe UI Emoji", "Segoe UI Symbol", "Noto Color Emoji" !default;

// Bootstrap Imports
@import "bootstrap/scss/bootstrap";

// Theme Imports
@import "base";
@import "fonts";
Again, npm watch will build our CSS after you save the file. Check out your browser for changes:
Replace Editbar#
If you are not happy with Plone's edit bar there are alternatives available. collective.sidebar is a drop in replacement and brings edit features and navigation together.
Add Dependency#
Add a dependency to collective.sidebar in setup.py. This grabs the package when you run buildout:
install_requires=[
    'setuptools',
    # -*- Extra requirements: -*-
    'z3c.jbot',
    'plone.api>=1.8.4',
    'plone.app.dexterity',
    'collective.sidebar',
],
Run Buildout#
You have to run buildout to fetch the package from pypi and add it to your setup:
$ ./bin/buildout
Restart Instance#
Restart your instance:
$ ./bin/instance stop
$ ./bin/instance start
Install the package in Site setup > Add-ons or create a new Plone site.