Extending Plone With Add-on Packages#
There are more than 2,000 add-ons for Plone.
A curated list of awesome add-ons for Plone Classic and the backend can be found at collective/awesome-plone
A curated list of awesome add-ons for Volto can be found at collective/awesome-volto
Using them saves a lot of development time.
Their target, complexity and configurability varies a lot.
Add-ons that do not fit your projects needs exactly can be customized by an additonal self-written add-on.
Plone 6 plays with two groups of add-ons: Add-ons for Plone and such for the frontend Volto.
The need of Plone add-ons is depending if you use Plone with or without Volto frontend. As by now, development took place in Plone. Now development will be done in Plone exclusively like before or both in Plone and in ReactJS.
Plone add-ons enrich the CMS by
adding content types
adding behaviors with new fields and relations for existing content types
adding content assembling features for overview pages
customizing the editor experience
designing the layout
Having a Volto frontend in place, you will apply Plone add-ons with some of the characteristics like above but also Volto add-ons that care about presentation of the content and editor experience.
We start with the scenario of Plone for both backend and frontend. So we use a classic Plone setup without Volto and with the huge repertoire of classic Plone add-ons. This is still be an option in particular as the number of Volto add-ons is just on the way to catch up on all the features and possibilities of Plone add-ons.
Chapter Using Volto add-ons explains how to apply one of the awesome Volto add-ons for enhancing editor experience, adding features like displaying data as charts, searching with a faceted navigation and a lot more.
Some notable Plone add-ons for a classic Plone setup without Volto frontend#
- collective.easyform
A form generator for editors.
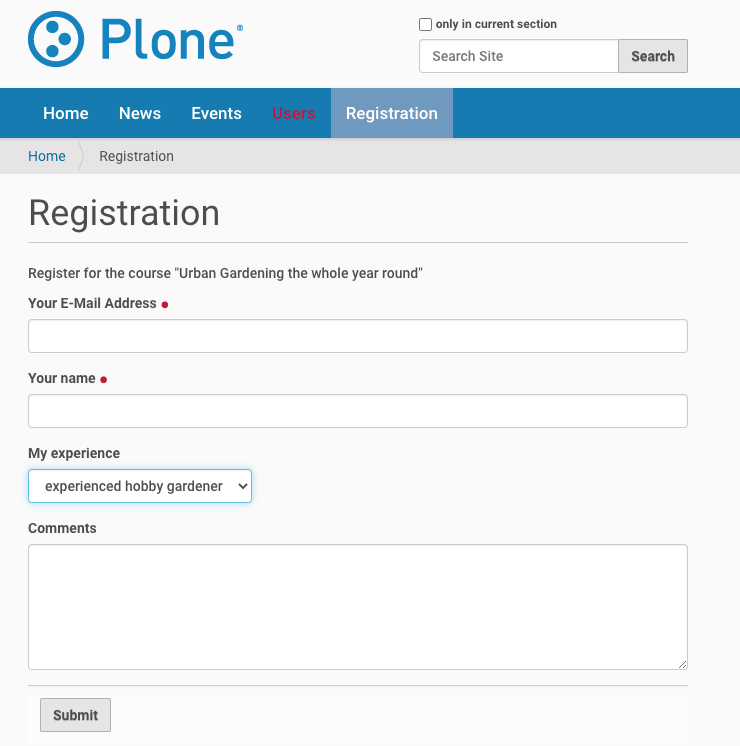
A simple form created with collective.easyform.#
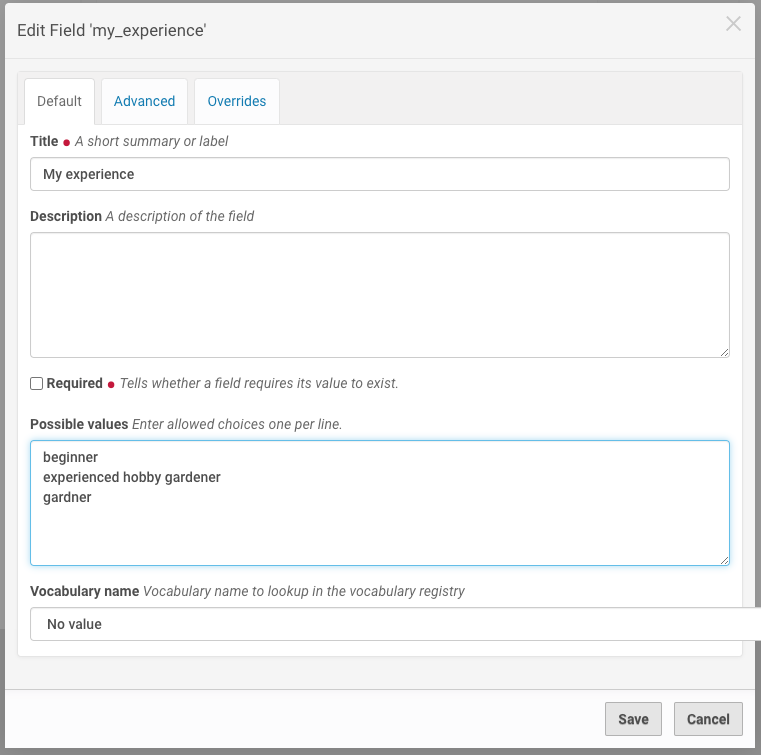
Editing a form field through the web.#
- collective.geo
Flexible bundle of add-ons to geo-reference content and display in maps
- collective.mailchimp
Allows visitors to subscribe to mailchimp newsletters
- eea.facetednavigation
Create faceted navigation and searches through the web.
- collective.lineage
Microsites for Plone - makes subfolders appear to be autonomous Plone sites
- collective.behavior.banner
Add decorative banners and sliders
How to find add-ons#
It can be very hard to find the right add-on for your requirements. Here are some tips:
Make a list of required features.
Then search using the follwing links below.
https://pypi.org/search/?c=Framework+%3A%3A+Plone >3400 Plone related packages - use the search form!
collective >1500 repos
plone >310 repos
google (e.g. Plone+Slider)
Once you have a shortlist, test these add-ons. Here are the main issues you need to test before you install an add-on on a production site:
Test all required features. Read but do not trust the documentation
Check if the add-on runs on your required version
Check if it is currently maintained
Does it have i18n-support, i.e. is the user-interface translated to your language?
Does it uninstall cleanly? A tough one. See https://lucafbb.blogspot.com/2013/05/how-to-make-your-plone-add-on-products.html for the reason why.
Check for unwanted dependencies
Once you found an add-on you like, you can ask the community if you made a good choice or if you missed something:
Message Board: https://community.plone.org
There is also a talk that discusses in depth how to find the right add-on: https://www.youtube.com/watch?v=Sc6NkqaSjqw
Either adapt your requirements to what is available, invest the time & money to modify an existing add-ons to fit your needs or create a new add-on that does exactly what you need.
Installing Plone Add-ons#
Installation is a two-step process.
Making the add-on packages available to Zope#
First, we must make the add-on packages available to Zope. This means that Zope can import the code. Buildout is responsible for this.
Look at the buildout.cfg file. In section [instance] is a variable called eggs, which has a list of eggs as a value. For example:
eggs =
    Plone
    collective.easyform
You add an egg to the configuration by adding a new line containing the package name. You must write the egg name indented: this way, buildout understands that the current line is a value of the last variable and not a new variable.
If you add new add-ons, you will have to run buildout and restart the site:
$ bin/buildout
$ bin/instance fg
Now the code is available from within Plone.
Installing add-ons in your Plone Site#
Your Plone site has not yet been told to use the add-on. For this, you have to activate the add-on in your Plone Site.
Note
Why the extra step of activating the add-on package? You may have multiple Plone sites (instances) in a single Zope installation. It's common to activate some add-ons in one site, others in another site.
In your browser, go to Site Setup (shortcut: add /@@overview-controlpanel to the Plone site URL), and open the Add-ons Panel. You will see a list of available add-ons.
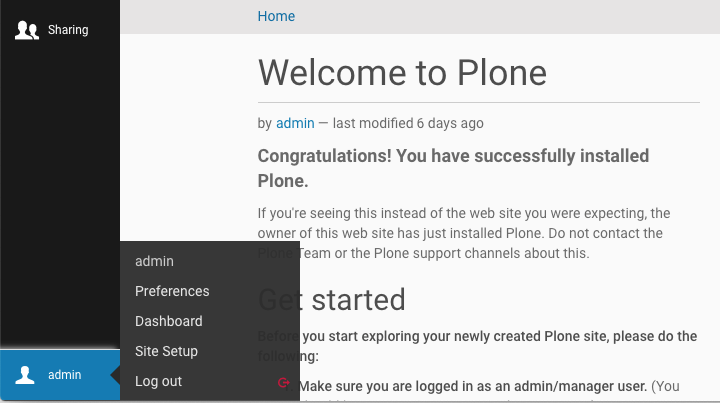
Link to Site Setup#
Install EasyForm (the human-readable name of collective.easyform) now.
This is what happens: The GenericSetup profile of the product gets loaded. This does things like:
Configuring new actions
Registering new content types
Registering css and js files
Creating some content/configuration objects in your Plone site.
Let's have a look at what we just installed.
collective.easyform#
There are many ways to create forms in Plone:
Pure: html and python in a BrowserView
Framework:
z3c.formTTW:
collective.easyform
The concept of collective.easyform is that you create a form and add some fields. Form submissions may be automatically emailed and saved for download.
Let's build a registration form:
Add an object of the new type 'EasyForm' in the site root. Call it "Registration".
Save and view the result, a simple contact form.
Select "Define form fields" in menu
action.Remove field "comments".
Add fields for name (a text line field) and for experience (a choice field).
Select "Define form actions" in menu
actions.Add a new action and select "Save Data" as the type. This stores the form data of incoming registrations.
Customize the mailer to address the course organisator and the person registering.
Note
Need CAPTCHAs to prevent spam? Read the instructions how to add a captcha field to easyform
Add page layout management with plone.app.mosaic#
plone.app.mosaic supports content assembling on a page of your site.
Add
plone.app.mosaicto the eggs section in the buildout.Activate the Mosaic add-on.
Go to a page in your site and select "Mosaic" of the
Displaymenu.Edit the page to select a Mosaic layout and try inserting some content blocks: text, existing page, list of news.
You can read more about the concepts and use of this add-on in the Mosaic documentation
Internationalization#
Plone can run the same site in many different languages.
We're not doing this with the conference site since the lingua franca of the Plone community is English.
We would use the built-in add-on plone.app.multilingual for this.
Building a multi-lingual site requires activating plone.app.multilingual, but no add-on is necessary to build a site in only one language. Just select a different site language when creating a Plone site, and all text in the user-interface will be switched to that language.
Summary classic Plone#
You are now able to customize and extend many parts of our website. You can even install extensions that add new functionality.