Installing Plone for the Training#
Keep in mind that you need a fast Internet connection during installation since you'll have to download a lot of data!
Warning
If you feel the desire to try out both methods below (with Vagrant and without),
make sure you use different training directories!
The two installations do not coexist well.
Installing Plone without vagrant#
Warning
If you are new to running Plone on your laptop you could skip this part and continue with Install VirtualBox.
If you are experienced with running Plone on your own laptop, we encourage you to do so because you will have certain benefits:
You can use the editor you are used to.
You can use omelette to have all the code of Plone at your fingertips.
You do not have to switch between different operating systems during the training.
If you feel comfortable, please work on your own machine with your own Python.
Please make sure that you have a system that will work, since we don't want you to lose valuable time!
Note
If you also want to follow the JavaScript training and install the JavaScript development tools, you need NodeJS installed on your development computer.
Note
Please make sure you have your system properly prepared and installed all necessary prerequisites.
The following instructions are based on Ubuntu and macOS. If you use a different operating system (OS), please adjust them to fit your OS.
On Ubuntu/Debian, you need to make sure you system is up-to-date:
sudo apt-get update
sudo apt-get -y upgrade
Then, you need to install the following packages:
sudo apt-get install python3.9-dev python3.9-tk python3.9-venv build-essential libssl-dev libxml2-dev libxslt1-dev libbz2-dev libjpeg62-dev
sudo apt-get install libreadline-dev wv poppler-utils
sudo apt-get install git
On macOS you at least need to install some dependencies with Homebrew
brew install zlib git readline jpeg libpng libyaml
For more information or in case of problems see the official installation instructions.
Set up Plone for the training like this if you use your own OS (Linux or Mac):
mkdir training
cd training
git clone https://github.com/collective/training_buildout.git buildout
cd buildout
python3.9 -m venv .
./bin/pip install -r requirements.txt
This creates a virtualenv with Python 3.9 in the folder buildout and installs some requirements in it.
Now you can run the buildout for the first time:
./bin/buildout
This will take a long time (~10 minutes on the least powerful Linode) and will produce a lot of output because it downloads and configures more than 260 Python packages. Once it is done, you can start your Plone instance with the following command.
./bin/instance fg
The output should be similar to:
pbauer@bullet:/workspace/training_buildout$  ./bin/instance fg
2019-09-05 20:11:03,708 WARNING [Init:89][MainThread] Class Products.CMFFormController.ControllerPythonScript.ControllerPythonScript has a security declaration for nonexistent method 'ZPythonScriptHTML_changePrefs'
2019-09-05 20:11:03,715 WARNING [Init:89][MainThread] Class Products.CMFFormController.ControllerValidator.ControllerValidator has a security declaration for nonexistent method 'ZPythonScriptHTML_changePrefs'
2019-09-05 20:11:03,776 WARNING [Products.PDBDebugMode:31][MainThread]

******************************************************************************

Debug-Mode enabled!

This will result in a pdb when a exception happens.
Turn off debug mode or remove Products.PDBDebugMode to disable.

See https://pypi.python.org/pypi/Products.PDBDebugMode

******************************************************************************

2019-09-05 20:11:04,858 INFO    [chameleon.config:38][MainThread] directory cache: /Users/pbauer/workspace/training_buildout/var/cache.
2019-09-05 20:11:07,151 WARNING [plone.behavior:172][MainThread] Specifying 'for' in behavior 'Tiles' if no 'factory' is given has no effect and is superfluous.
2019-09-05 20:11:08,353 WARNING [PrintingMailHost:30][MainThread] Hold on to your hats folks, I'm a-patchin'
2019-09-05 20:11:08,353 WARNING [PrintingMailHost:124][MainThread]

******************************************************************************

Monkey patching MailHosts to print e-mails to the terminal.

This is instead of sending them.

NO MAIL WILL BE SENT FROM ZOPE AT ALL!

Turn off debug mode or remove Products.PrintingMailHost from the eggs
or remove ENABLE_PRINTING_MAILHOST from the environment variables to
return to normal e-mail sending.

See https://pypi.python.org/pypi/Products.PrintingMailHost

******************************************************************************

2019-09-05 20:11:08,390 INFO    [Zope:45][MainThread] Ready to handle requests
Starting server in PID 30620.
Serving on http://0.0.0.0:8080
If the output says Serving on http://0.0.0.0:8080 then you are in business.
If you point your browser at http://localhost:8080 you see that Plone is running.
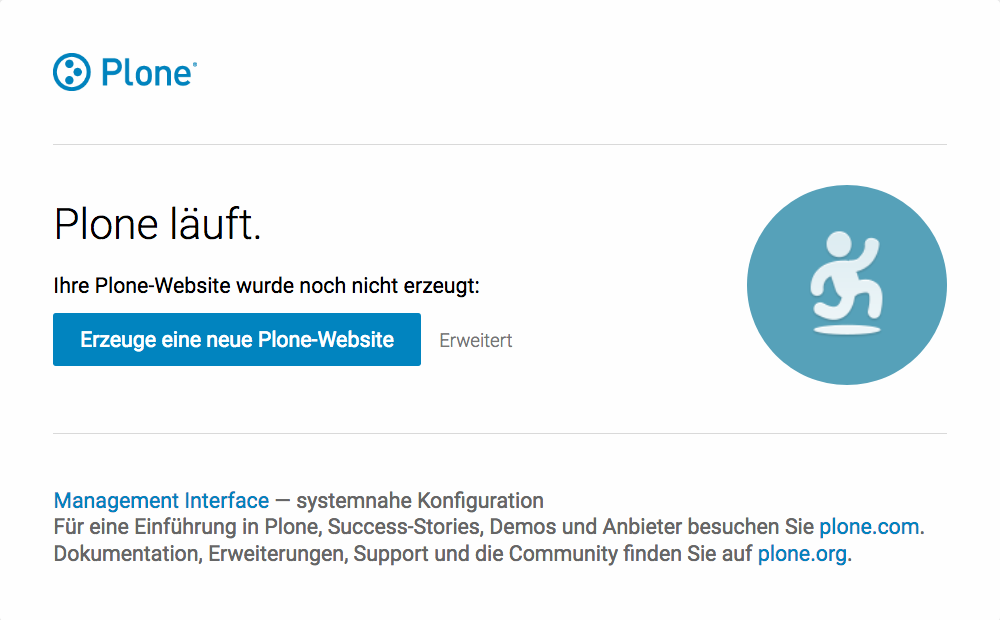
A running plone instance.#
There is no Plone site yet - we will create one in chapter 6.
Now you have a working Plone site up and running and can continue with the next chapter.
You can stop the running instance anytime using ctrl + c.
Warning
If there is an error message you should either try to fix it or use vagrant and continue in this chapter.
Installing Plone with Vagrant#
We use a virtual machine (Ubuntu 18.04) to run Plone during the training.
We rely on Vagrant and VirtualBox to give the same development environment to everyone.
Vagrant is a tool for building complete development environments.
We use it together with Oracle’s VirtualBox to create and manage a virtual environment.
Install VirtualBox#
Vagrant uses Oracle’s VirtualBox to create virtual environments.
Here is a link directly to the download page: https://www.virtualbox.org/wiki/Downloads.
We use VirtualBox 6.0.x
Install and configure Vagrant#
Get the latest version from https://developer.hashicorp.com/vagrant/downloads for your operating system and install it.
Now your system has a command vagrant that you can run in the terminal.
First, create a directory in which you want to do the training.
Warning
If you already have a training directory because you followed the Installing Plone without vagrant instructions above,
you should either delete it, rename it, or use a different name below.
mkdir training
cd training
Setup Vagrant to automatically install the current guest additions. You can choose to skip this step if you encounter any problems with it.
vagrant plugin install vagrant-vbguest
Now download plone_training_config.zip and copy its contents into your training directory.
wget https://github.com/plone/training/raw/master/_static/plone_training_config.zip
unzip plone_training_config.zip
The training directory should now hold the file Vagrantfile and the directory manifests which again contains several files.
Now start setting up the virtual machine (VM) that is configured in Vagrantfile:
vagrant up
This takes a veeeeery loooong time (between 10 minutes and 1h depending on your Internet connection and system speed) since it does all the following steps:
downloads a virtual machine (Official Ubuntu Server 18.04 LTS, also called "Bionic Beaver")
sets up the VM
updates the VM
installs various system-packages needed for Plone development
clones the training buildout into /vagrant/buildout
builds Plone annd installs all dependencies
Note
Sometimes this stops with the message:
Skipping because of failed dependencies
If this happens or you have the feeling that something has gone wrong and the installation has not finished correctly for some reason you need to run the following command to repeat the process.
This will only repeat steps that have not finished correctly.
vagrant provision
You can do this multiple times to fix problems, e.g. if your network connection was down and steps could not finish because of this.
Note
If while bringing vagrant up you get an error similar to:
ssh_exchange_identification: read: Connection reset by peer
The configuration may have stalled out because your computer's BIOS requires virtualization to be enabled. Check with your computer's manufacturer on how to properly enable virtualization.
Once Vagrant finishes the provisioning process, you can login to the now running virtual machine.
vagrant ssh
Note
If you use Windows you'll have to login with putty.
Connect to mailto:vagrant@127.0.01 at port 2222. User and password are vagrant.
You are now logged in as the user vagrant in /home/vagrant.
We'll do all steps of the training as this user.
Instead we use our own Plone instance during the training.
It is in /vagrant/buildout/. Start it in foreground with ./bin/instance fg.
vagrant@training:~$ cd /vagrant/buildout/
vagrant@training:/vagrant/buildout$ ./bin/instance fg
2019-03-07 10:38:17,666 WARNI [Init:88][MainThread] Class Products.CMFFormController.ControllerPythonScript.ControllerPythonScript has a security declaration for nonexistent method 'ZPythonScriptHTML_changePrefs'
2019-03-07 10:38:17,670 WARNI [Init:88][MainThread] Class Products.CMFFormController.ControllerValidator.ControllerValidator has a security declaration for nonexistent method 'ZPythonScriptHTML_changePrefs'
2019-03-07 10:38:21,160 WARNI [plone.behavior:172][MainThread] Specifying 'for' in behavior 'Tiles' if no 'factory' is given has no effect and is superfluous.
2019-03-07 10:38:22,473 WARNI [PrintingMailHost:30][MainThread] Hold on to your hats folks, I'm a-patchin'
2019-03-07 10:38:22,474 WARNI [PrintingMailHost:124][MainThread]

******************************************************************************

Monkey patching MailHosts to print e-mails to the terminal.

This is instead of sending them.

NO MAIL WILL BE SENT FROM ZOPE AT ALL!

Turn off debug mode or remove Products.PrintingMailHost from the eggs
or remove ENABLE_PRINTING_MAILHOST from the environment variables to
return to normal e-mail sending.

See https://pypi.python.org/pypi/Products.PrintingMailHost

******************************************************************************

2019-03-07 10:38:22,510 INFO  [Zope:44][MainThread] Ready to handle requests
Starting server in PID 25230.
Serving on http://0.0.0.0:8080
Note
In rare cases when you are using macOS with an UTF-8 character set starting Plone might fail with the following error:
ValueError: unknown locale: UTF-8
In that case you have to put the localized keyboard and language settings in the .bash_profile
of the vagrant user to your locale (like en_US.UTF-8 or de_DE.UTF-8)
export LC_ALL=en_US.UTF-8
export LANG=en_US.UTF-8
Now the Zope instance we're using is running. You can stop the running instance anytime using ctrl + c.
If it doesn't, don't worry, your shell isn't blocked.
Type reset (even if you can't see the prompt) and press RETURN, and it should become visible again.
If you point your local browser at http://localhost:8080 you see that Plone is running in Vagrant.
This works because VirtualBox forwards the port 8080 from the guest system (the vagrant Ubuntu) to the host system (your normal operating system).
There is no Plone site yet - we will create one in chapter 6.
The Buildout for this Plone is in a shared folder.
This means we run it in the vagrant box from /vagrant/buildout but we can also access it in our own operating system and use our favorite editor.
You will find the directory buildout in the directory training that you created in the beginning
next to Vagrantfile and manifests.
Note
The database and the python packages are not accessible in your own system since large files cannot make use of symlinks in shared folders.
The database lies in /home/vagrant/var, the python packages are in /home/vagrant/packages.
If you have any problems or questions please mail us at mailto:team@starzel.de or create a ticket at plone/training#issues.
What Vagrant does#
Installation is done automatically by vagrant and puppet. If you want to know which steps are actually done please see the chapter What Vagrant is and does.
Note
Vagrant Care and Handling
Keep in mind the following recommendations for using your Vagrant VirtualBoxes:
Use the vagrant suspend or vagrant halt commands to put the VirtualBox to "sleep" or to "power it off" before attempting to start another Plone instance anywhere else on your machine, if it uses the same port. That's because vagrant "reserves" port 8080, and even if you stopped Plone in vagrant, that port is still in use by the guest OS.
If you are done with a vagrant box, and want to delete it, always remember to run vagrant destroy on it before actually deleting the directory containing it. Otherwise you'll leave its "ghost" in the list of boxes managed by vagrant and possibly taking up disk space on your machine.
See vagrant help for all available commands, including suspend, halt, destroy, up, ssh and resume.